Thursday, January 14, 2016

From Slumber to Sloan >>> Upcycled Leggings

I basically live in skirts and leggings over the winter.  I've discovered since switching from jeans to leggings, that leggings actually do a better job at keeping my legs warm.  That's not why I originally made the switch, but it's definitely a reason to be excited about them.

As the weather began to turn cold, I realized that I only have two pair of leggings that I really like to wear.  One of them is more of a cropped fall/spring pair and the other (which I'm wearing right now) is a down to your ankles pair that gets worn pretty much every day.  I realized that I REALLY needed another pair (for everyone's sake).

I looked in stores, but wasn't too happy - so much black, no creativity whatsoever.  And, no brown in sight!  I came to the realization that to get any sort of variety, I'd have to make them myself!  So, I went to Pinterest and found the Sloan legging pattern by Hey June (affiliate).  It sounded like a great pattern to me especially when I saw that there was actually a tall size included with the pattern.  To top it all off I got it on sale - what more can I say?


Ok, so now you are thinking - why the stripes?  Since this was the first time I had sewn leggings, I wanted to find some fabric I could practice with.  I was shopping at my local thrift store and came across the perfect knit dress...a very large knit dress.  Time to come off the rack, wake up, and become something new!

It happened to be a Liz Claiborne dress that I got for just $1.  I was pretty happy with the find because it was just one long piece of knit fabric with no seams down the middle.  The fabric is made of 95% cotton and 5% spandex.  The pattern calls for a fabric with a bit more stretch, but I really like the feel of cotton.  My favorite pair of leggings (the ones I have on right this minute:) has the exact same blend and they are just so much more comfortable than the other ones I have, made of more stretchy material.                   

The pattern was really easy to cut.  I just turned the dress inside out and and laid the pattern down on top of both layers, pinned, and cut them out at the same time.  This actually helped with lining up the stripes for sewing because I left the original seams intact (they somehow sewed them perfectly aligned - amazing).

There was really only enough fabric to do the legs.  But, I found an outgrown kid's navy blue knit skirt to cut up for the waistband.  I think it matches great and added some contrast to the never ending stripes.


While I was at it, I also added the two grey patches right above the knees.  The material came from a sweater that was too small.  I've been itching to cut up a sweater - just to see what would happen.  Would it all suddenly unravel?  It was surprisingly easy to cut and sew and didn't run away on me (and quite an exhilarating experience at that).

Instead of piecing the leggings, I just did an overlay.  I'm glad I did it that way because I discovered that it did not work to just lay the piece straight across the stripes.  It had to be angled in order to reach the other side.

I finally figured it had to do with the lines on either side of the leg being different angles and that I should have probably cut the pieces at an angle to begin with.  The only way that thought even entered my mind is because my daughter is doing Geometry for math - found out it really is pretty useful stuff.


So, I guess you could call this pair a sort of muslin (who says a muslin has to be boring and useless!).  In making the muslin I cut the leggings a size larger than what I actually measured because I'm always paranoid that my cutting won't be straight enough.  In that case, it always helps to leave some wiggle room.

I probably left a little bit too much wiggle room because they are pretty roomy.  And, although I used the elastic around the top of the waistband, I did not have any of the knit interfacing.  I think that would definitely help to make it more snug.  For my next pair (yes, there will be many more to come), I will be more brave and cut the right size and try to get ahold of some of that knit interfacing.

I didn't sew in the pocket because I didn't think I'd need one in this pair.  In reality these will probably become a pair of pajamas or a wear around the house kind of pair of leggings.  But, if I get brave enough or am in the right kind of mood, I might wear them like this!


I don't know, I think I actually kind of like them...

Tuesday, December 8, 2015

Savor a Selah >>> A Kite Banner Tutorial


How often do you purposely pause each day?  How often do you take a moment to just breathe and reflect?  Would time still pass as quickly as it seems if we took the time to truly stop each day?  Most of us need help to push the pause button in our lives. And that is where a "Selah" enters the picture.

Selah is a Hebrew word which comes from the book of Psalms and means simply "to pause".  Our family has adopted the word as a reminder in this hustle and bustle kind of life to take the time to turn our thoughts heavenward.  When we "Selah" we pause to reflect on the good things we've been blessed with and give thanks.

We've had a hand written Selah sign hung over our table for awhile and it truly causes us to pause and give thanks, especially at meal time.  Since it's become such a meaningful part of our lives, I wanted to create something more permanent than paper and also more pleasing to the eye.  Thus was born the Selah Kite Banner.


This is a banner in the shape of little kites appliqued with the letters to spell Selah.  I chose the kite shape because it speaks to me of lifting our eyes from the immediate circumstances around us, up toward the heavens where we express our hearts to Abba Father.  It was a joy to create and I hope you will enjoy making one too.

Here are the supplies that you will need to make a Selah banner:

>> 2 copies of the Selah kite template: one printed on paper and one on cardstock found here: Selah Kite Template  The template has a 1/2" seam allowance marked by the dashed lines.
>> 1 copy of Selah letter template found here: Selah Letter Template 
>> 6 different fabrics: I used a combination of fabrics that I had in my stash, remnants, and clothing too small or not needed.  For each kite you will need two 10 1/2" x 8" pieces of fabric.  The 6th piece of fabric is for the lettering.  You can fit the letters on an 11" x 4" piece of fabric.
>> Wonder Under by Pellon (or your favorite fusible web product) (also 11" x 4")
>> 16 1/2" of 3/4" wide lace or ribbon for hanging loop and tail
>> ribbon, lace, trim or string to hang up your banner (length will be determined by the area you decide to hang the banner)

{Instructions}

Print out the Selah Kite Template on paper (easier to pin), cut out around the solid border, and pin to your fabric.  Cut the fabric along the edges of the template which includes a 1/2" seam allowance.

For those who love all the colors, choices, and possibilities of fabric combinations this is going to be a lot of fun because now... you do this a total of 10 times so that you have 5 coordinating fronts and backs.

My first kite was made from this fabric which has some cheery cherry blossoms set against the ice blue cold of winter.  I was so excited to finally bring this beauty out and off of the shelf.


After cutting out the kite shapes, you need to make the applique letters.  I used the 6th piece of fabric (red with polka dots) for the letters.

Print and cut out the Selah Letter Template.  I've included both forward facing and backward facing letters on the template, but only used the backward ones for this project.  The forward facing letters are included for reference only.

Place your backward facing letter on the smooth side of the Wonder Under (fusible web) and trace around it.  Then cut it out and iron the rough side onto your fabric according to the directions included with the Wonder Under.

Cut out the fabric letter and peel off the paper backing from the Wonder Under.  Now place it facing the correct way onto the front of your first kite piece (centered between the two side points of the kite like picture below) and iron according to package directions.


Now take your appliqued front kite piece to your sewing machine and zigzag around the letter.  I did this with a matching thread which you can see if you look closely in the picture below.


Now take the second copy of the Selah Kite Template (on cardstock) and cut along the dashed line which marks the seam allowance.  This will be the template that you use to iron your 1/2" seam allowances shown in the pictures below.  

**Note: you might want to use the dry setting on your iron for the seam allowances to avoid burning your fingers with the steam (like I did!).  You can switch to steam to help set the creases once the initial folding is done.

Place the template in the center of your appliqued front kite piece.  Begin to iron the seam allowance along the top section.  One section will fold over the other to make the top point.  Then iron the point at the bottom up to make a straight line crease.  Finally iron over the remaining two sides.  One section will fold over the other at the bottom point. 


Now remove the cardstock template.  Cut 3 1/2" of ribbon for the hanging loop.  Iron it in half and place it at the top point of the kite sticking above the point about 3/4".  Cut a second piece of ribbon that is 13" for the tail.  Place it at the bottom point of the kite as shown in the 1st picture below.

Iron the seams for the back piece of the kite (pink and white striped piece) as described above and place this piece on top of the front piece.  Carefully match the points and pin it together.  Topstitch a 1/4" seam around the entire edge of the kite.


Now cut three pieces of scrap fabric to decorate the tail of the kite.  The pieces I used were approximately 5 1/2" x 3/4".  I left them with raw edges because I liked the fluttery look it gave.  If you sew seams they will look more stiff.  Tie them on in a loose knot evenly spaced on the tail.

I used a pretty pink and white trim that I had in my stash to string up the kites.  You simply thread the trim through the loops you created at the top point of the kite. 


Repeat the steps until you've made all five beautiful kites.  Don't they look so sweet hanging together and...


...all of that hard work comes with an added bonus.  The kites are completely reversible.  I decided not to applique the other side of mine, but you certainly could.

The door is open wide to the creative possibilities for this little banner.


I hope you enjoyed this tutorial.  If you have questions or comments use the comment section below or contact me over on the side bar.  I'd love to hear from you.

May you savor a Selah today!

Wednesday, October 14, 2015

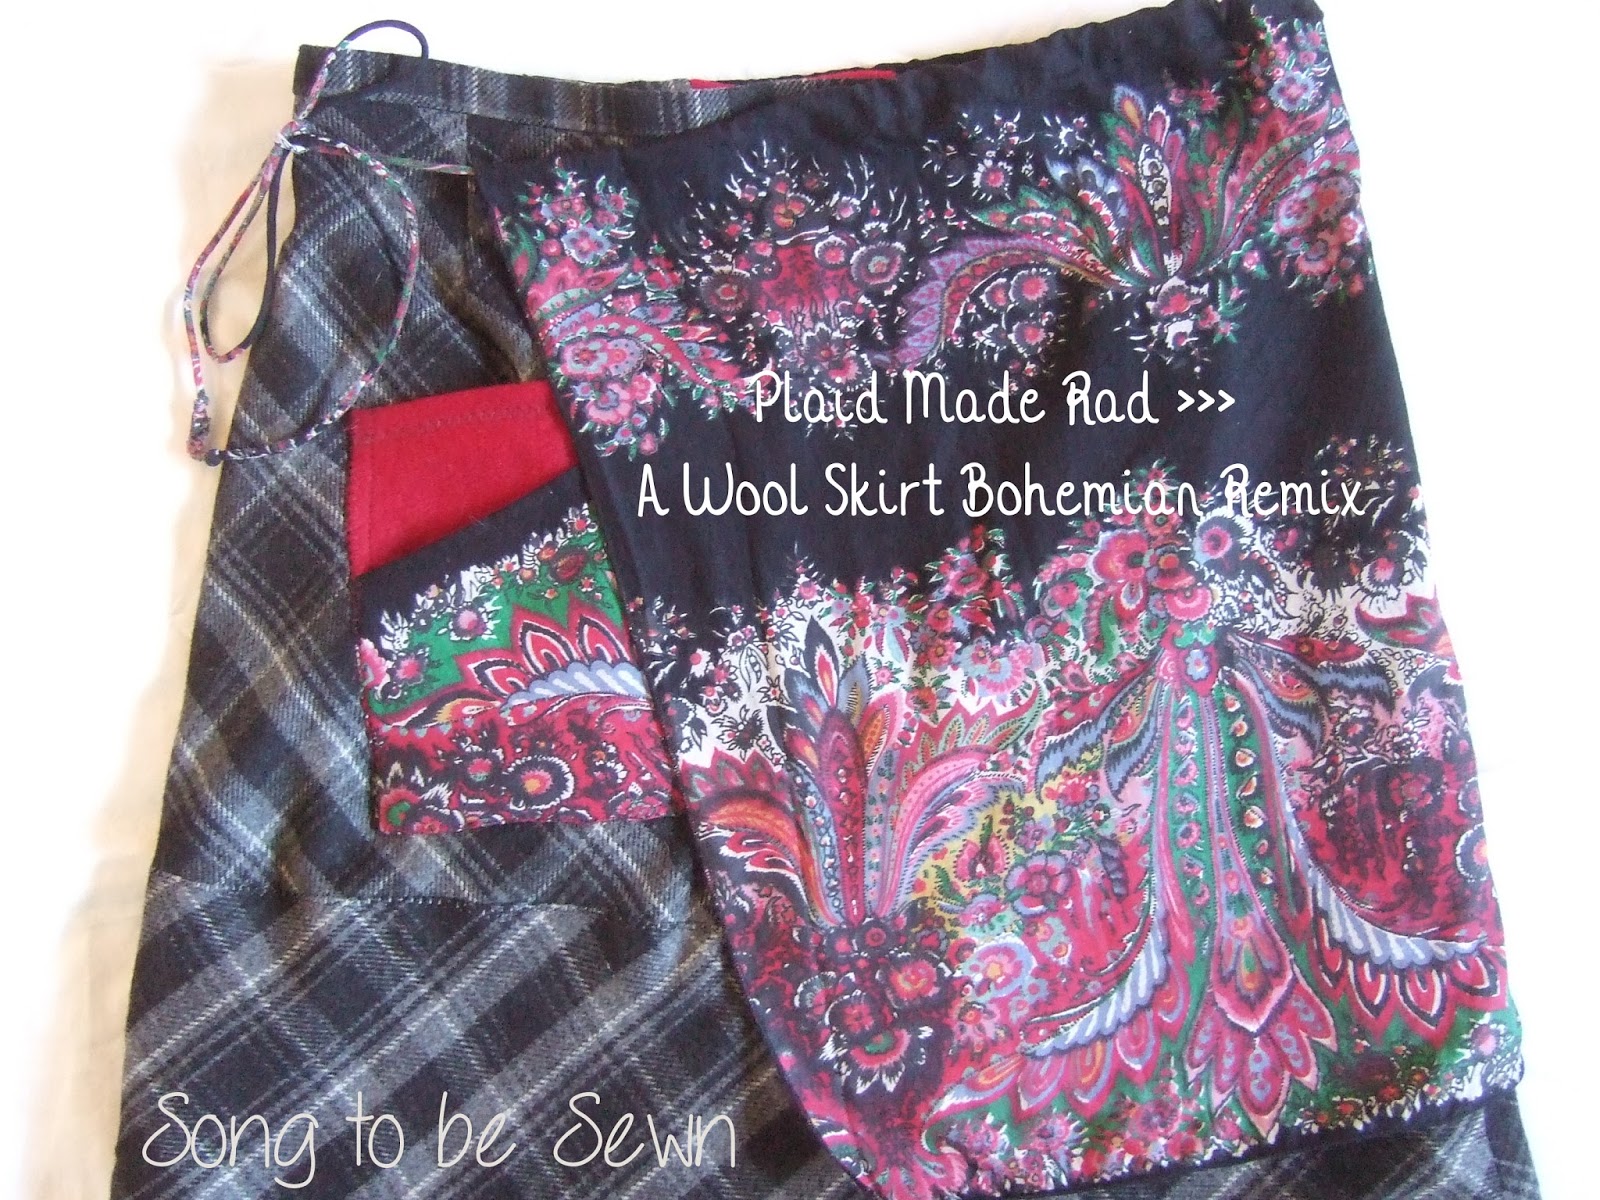
Plaid Made Rad >>> A Wool Skirt Bohemian Mix


I bought this skirt last winter and wore it a handful of times.  It's wool - perfect for those cold winter days.  However, every time I wore it there were some things that just weren't right about it.

The skirt was just too long and wide...I felt like it aged me when I wore it...not good.  Then, even though it is made of wool, Eddie B. thought it would be helpful to put a lining in it that made it actually feel freezing cold every time I put it on, thereby canceling out the warmth factor that wool is famous for.  Another thing is that most of the time, these nice wool skirts are sewn with a waist so high you feel like you are drowning in them.  I finally gave up on wearing it and eventually just shelved it thinking I would make a bag with all of that nice, but excessive fabric.


Then last week when the temps dropped a bit and I opened up the winter bin, I began thinking about warm clothes again.  I realized that I really didn't have that many skirt options for winter, so out came the long woolen skirt for an update that I'm going to share with you today.  If you have a skirt such as this one, there is hope and if you don't, you might want to get to the thrift store to find one.

The first thing I did was to seam rip the waistband...inner seam first, sides, and then the outer seam.  I found out something really surprising.  When I tried the skirt on without the waistband, it dropped from the upper waistline, to just above my hips.  The waistband was a full 3 inches shorter than the actual top edge of the skirt.


To fix the waist too high situation, I cut a piece of red wool from a previously upcycled coat that was about 4 inches long and as wide as the opened waistband.  Then I cut the waistband apart in the back and added the piece there.  It was a fun, subtle way to add some color to the skirt.  I removed the lining of the skirt and then re-attached the waistband just as it had been sewn on in the first place and with the added length, it now hits me in just the right spot.  Two out of the three problems already solved!


Now for the fun part - the redesign.  The first thing I did was to cut 8 inches off the bottom of the skirt.  I thought it would be nice to break up the plaid patterning a bit, so I reattached it 14 1/2 inches up from the bottom.  I used a zigzag stitch to attach it, which made it less bulky and helped to give it a more relaxed look.


I really wanted to add a pop of color on the front of the skirt.  I love when a skirt has pockets.  There are so many different ways to make a pocket, which adds function and flair to an otherwise boring piece of clothing.  I also like my pockets to be warm, so I cut out some more of that red wool to make a pocket that is a bit wider at the bottom than the top.  Then I layered it with a second pocket on top.  The fabric for this layer came from a lightweight blouse which the fabric I loved, but because of the boxy design didn't get much wear.  I zigzag stitched that to the front - the imperfect stitching only adds to the charm of the piece I think.

I thought I was just going to zigzag the bottom hem, but I decided to look through my stash of trims I've picked up here and there.  There was a package of red braided piping, so I thought, hey why not add a bit more color.  I think it made a nice finish to the bottom.


The skirt itself was finished at this point, but I wanted to make something that would increase the bohemian factor if so desired.  A skirt apron was the perfect thing.  It was so simple.  I took an oversize blouse (the same one I used for the pocket overlay) and cut off the front just below the neckline.  Because the style of the blouse was so boxy, the cut gave me a perfect rectangle for the apron.  I made a 1 inch casing at the top by folding the edge over twice and sewing.  I used the tie from the blouse as the tie for my apron.  In a just a few minutes it was done!


I really like it tied to the side like in the pic below, but it can be worn in the front or back as well.  It can also be worn with some of my other skirts.  I love the whole look - the mix of the lightweight bohemian fabric with the wool really brings this skirt to life!