Wednesday, October 14, 2015

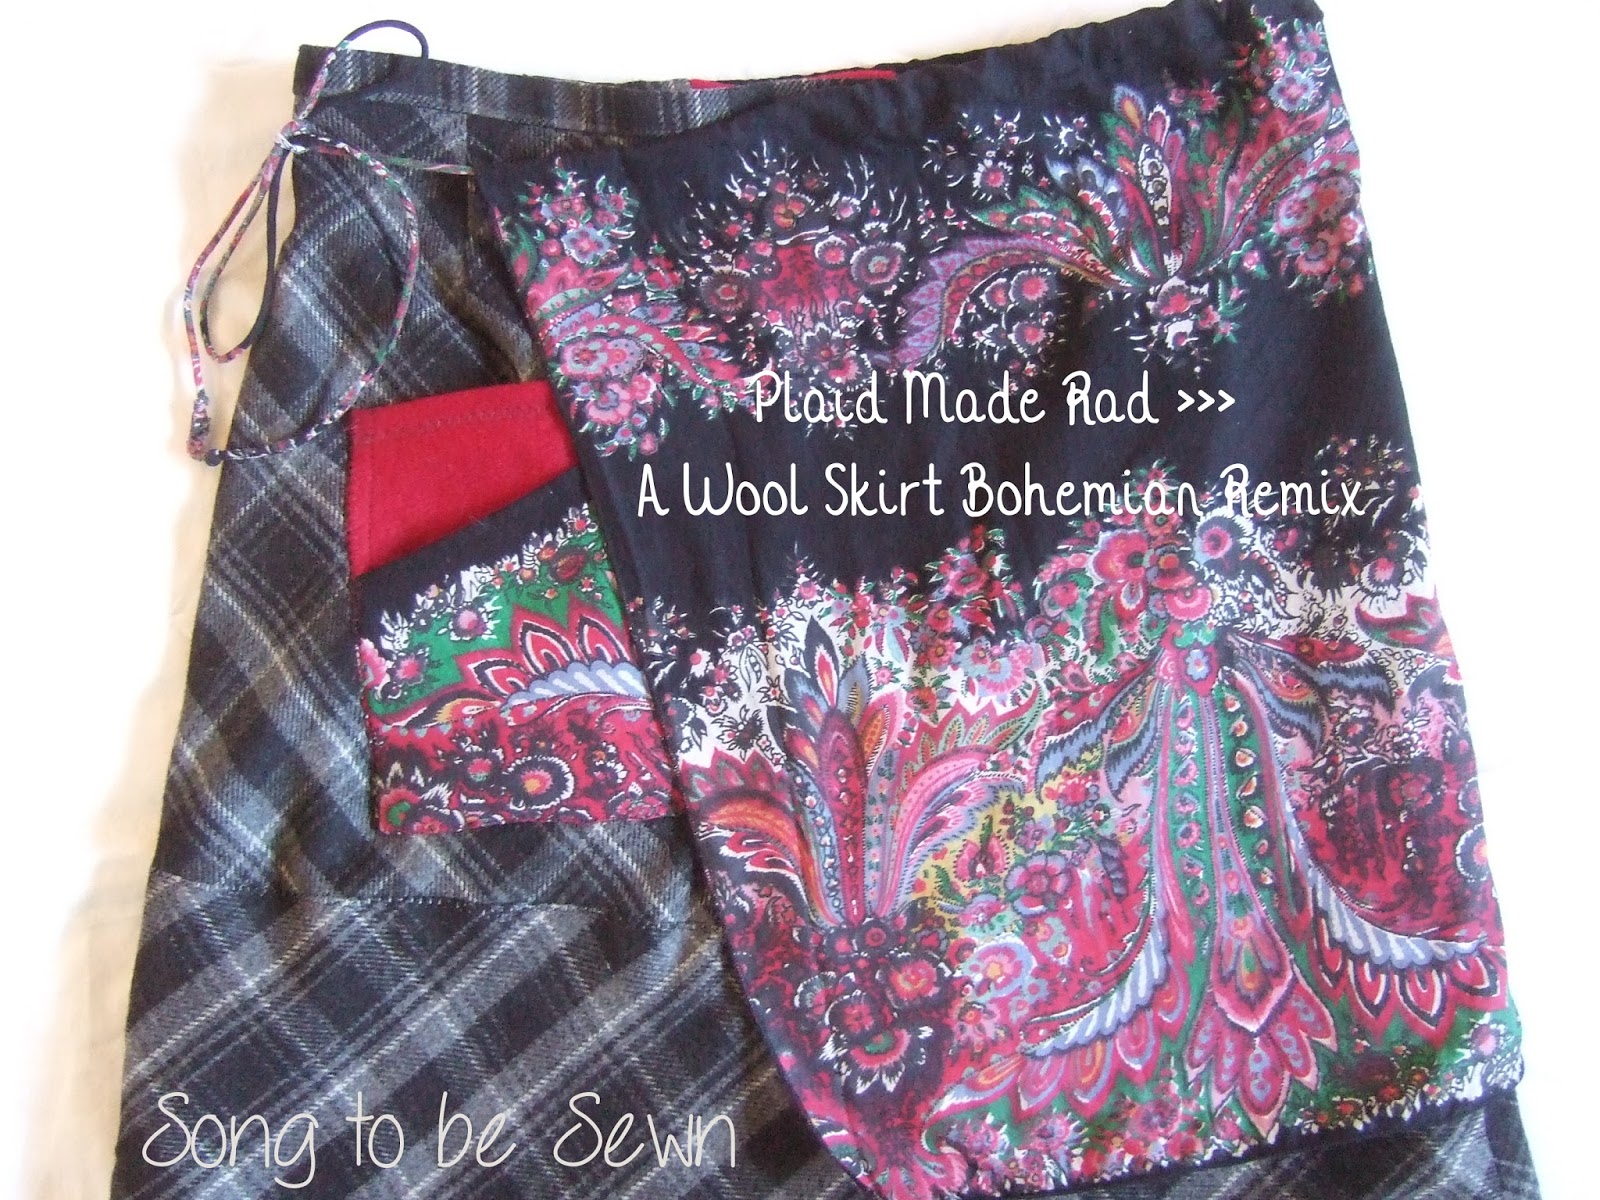
Plaid Made Rad >>> A Wool Skirt Bohemian Mix


I bought this skirt last winter and wore it a handful of times.  It's wool - perfect for those cold winter days.  However, every time I wore it there were some things that just weren't right about it.

The skirt was just too long and wide...I felt like it aged me when I wore it...not good.  Then, even though it is made of wool, Eddie B. thought it would be helpful to put a lining in it that made it actually feel freezing cold every time I put it on, thereby canceling out the warmth factor that wool is famous for.  Another thing is that most of the time, these nice wool skirts are sewn with a waist so high you feel like you are drowning in them.  I finally gave up on wearing it and eventually just shelved it thinking I would make a bag with all of that nice, but excessive fabric.


Then last week when the temps dropped a bit and I opened up the winter bin, I began thinking about warm clothes again.  I realized that I really didn't have that many skirt options for winter, so out came the long woolen skirt for an update that I'm going to share with you today.  If you have a skirt such as this one, there is hope and if you don't, you might want to get to the thrift store to find one.

The first thing I did was to seam rip the waistband...inner seam first, sides, and then the outer seam.  I found out something really surprising.  When I tried the skirt on without the waistband, it dropped from the upper waistline, to just above my hips.  The waistband was a full 3 inches shorter than the actual top edge of the skirt.


To fix the waist too high situation, I cut a piece of red wool from a previously upcycled coat that was about 4 inches long and as wide as the opened waistband.  Then I cut the waistband apart in the back and added the piece there.  It was a fun, subtle way to add some color to the skirt.  I removed the lining of the skirt and then re-attached the waistband just as it had been sewn on in the first place and with the added length, it now hits me in just the right spot.  Two out of the three problems already solved!


Now for the fun part - the redesign.  The first thing I did was to cut 8 inches off the bottom of the skirt.  I thought it would be nice to break up the plaid patterning a bit, so I reattached it 14 1/2 inches up from the bottom.  I used a zigzag stitch to attach it, which made it less bulky and helped to give it a more relaxed look.


I really wanted to add a pop of color on the front of the skirt.  I love when a skirt has pockets.  There are so many different ways to make a pocket, which adds function and flair to an otherwise boring piece of clothing.  I also like my pockets to be warm, so I cut out some more of that red wool to make a pocket that is a bit wider at the bottom than the top.  Then I layered it with a second pocket on top.  The fabric for this layer came from a lightweight blouse which the fabric I loved, but because of the boxy design didn't get much wear.  I zigzag stitched that to the front - the imperfect stitching only adds to the charm of the piece I think.

I thought I was just going to zigzag the bottom hem, but I decided to look through my stash of trims I've picked up here and there.  There was a package of red braided piping, so I thought, hey why not add a bit more color.  I think it made a nice finish to the bottom.


The skirt itself was finished at this point, but I wanted to make something that would increase the bohemian factor if so desired.  A skirt apron was the perfect thing.  It was so simple.  I took an oversize blouse (the same one I used for the pocket overlay) and cut off the front just below the neckline.  Because the style of the blouse was so boxy, the cut gave me a perfect rectangle for the apron.  I made a 1 inch casing at the top by folding the edge over twice and sewing.  I used the tie from the blouse as the tie for my apron.  In a just a few minutes it was done!


I really like it tied to the side like in the pic below, but it can be worn in the front or back as well.  It can also be worn with some of my other skirts.  I love the whole look - the mix of the lightweight bohemian fabric with the wool really brings this skirt to life!


Sunday, September 20, 2015

Bringing Closure >>> A Button Tab Closure

In all of my sewing endeavors, one of the things that I’ve come to enjoy most is sewing up a good bag.  One size usually fits all, so no need to try the item on over and over again for that perfect fit.  And bags are really easy to customize which is one of my favorite things to do when sewing.  I love the flexibility a bag gives you to play with fabrics, pockets, and other fun details.  Also, your typical bag only takes a few hours to sew which gives that quick satisfaction of a completed project.  

I’ve had my eye on a great bag pattern for awhile and the great thing is, it’s free!  The Bucket Basket Tote from Very Shannon has a unique curved opening and it’s one of those patterns that really is fun to play with to make it your own.

There is however one thing that I almost cannot live without in a bag….closure people, I must have closure.  If there be no closure, it would be too easy for people to peek inside and if perchance the bag be knocked over, the contents (months of receipts and old shopping lists in my case) would be exposed for all the world to see.  I just can’t bear the thought of it.

So, to this beautiful, fun, and open bag, I bring closure.  Closure can come in many forms, but another thing which I love to put on bags are buttons.  So to this bag I’ve added a button tab closure and a button of course, to keep things secure.

If you also would like to add a button tab closure, here is what you do:
STOP!!!!....at step 10 on the instructions for the Bucket Basket Tote.  Follow all of the steps below before moving on to Step 11.  Of course, there’s always the seam ripper if you didn’t stop in time.  Now you may proceed….

1) Choose a button about ¾ inches in diameter.  You can choose something bigger or smaller, but you may have to make adjustments to the size of the tab.  The 3/4 inch size seems to work perfectly with this bag.

Find your needle and thread and sew the button to the front of your outer bag piece so that it is centered between the straps and 1/8 inch above the middle panel.

2) Choose the fabric you’d like to use for your tab.  I used the same fabric as I did on the straps.  Cut the piece of fabric 5 inches long x 3 ½ inches wide.
Note:  I did not use interfacing for this tab because the fabric I used is very sturdy.  Use interfacing if you are using anything lighter than décor weight fabric.
Take the piece of fabric and iron ¼ inch folds on 3 sides leaving one short edge unturned.

Now fold the piece in half with the two long edges matched up evenly and iron so that it is nice and flat.
Edge stitch all 3 folded sides leaving the short unturned edge raw and unsewn.

3) Make a button hole in the tab centered and up ¼ inch from the short finished edge.

4) Baste the raw unfolded edge of the tab to the back outer bag piece centered between the two straps on the right side (of the fabric).  The button hole should be pointing down towards the bottom of the outside of the bag (not sticking up above the bag and not inside the bag).

Now continue with Step 11 on the Bucket Basket Tote instructions to finish your bag.   
 

The only trouble I had was placing the straps in exactly the right position.  I don't know why, but it took forever to get them centered...hello seam ripper.


But, the bag made up for it in all its cheeriness with its smiley opening that says, "Hey, I'm not just your typical, ordinary tote bag.  I'm destined to carry greatness and on top of that my button tab assures you I can be trusted to keep it all safe inside."


Thursday, August 6, 2015

Not Your Ordinary Couscous >>> Israeli Couscous Recipe

I've loved making couscous for quite some time.  This time of year it's especially nice because of all the fresh veggies coming out of the garden.  The recipe that I'm going to share with you today is made with a special kind of couscous that you normally don't see in stores.  However, if you live near a Trader Joe's or a Big Lots, you should be able to find some. 


It's called either Israeli Couscous like the one on the left from Trader Joe's or Pearled Couscous like the one on the right that I found at Big Lots.  The grain of the Israeli couscous is much bigger and smoother than regular couscous.

The main dish that I make with it is actually more like a side dish...kinda like a pasta salad.

To make the Israeli couscous salad

You will need:
1 1/3 c Israeli couscous (the entire TJ's box)
1 3/4 c water
1 t salt
1 T oil

Cook according to the package.  Brown the couscous in a bit of oil, slowly pour in the water and simmer for about 12 minutes.  Fluff it with a fork and let it cool in the pan while you are cutting up the veggies and making the dressing.

Next you will need:
1 medium cucumber
1 cup fresh tomatoes
2-3 T cilantro
2-3 garlic cloves
3 T lemon juice
1 t lemon zest

Chop tomatoes and cucumbers and put them in a medium serving bowl.


Finely chop the cilantro and garlic cloves and add them to the bowl.


Also squeeze the lemon juice, add the zest, and a couple pinches of salt and pepper over the top.

Next you will need:
1 T balsamic vinegar
1 1/2 T olive oil

Pour these right over the top of your veggies in the bowl and put this in the fridge until the couscous has finished cooling.

When couscous has cooled, take out your bowl of veggies and combine them together until mixed well.


Garnish with some sprigs of cilantro if you'd like.  Then take a big spoon and enjoy...or, take it to a potluck and share with friends!


Have you ever tried Israeli couscous?  Do you have a favorite recipe?  Please share in the comments below.  I would love to hear how you make it!